Wednesday, March 30, 2011

Adobo on Adobo on Adobo

When will I ever freakin' learn? Today's day 4 of my daily lechon habit. Suffice to say graduation parties sponsored most of my lunch and dinner for the better part of the week. After this morning's binge, I told myself - NEVER AGAIN.

Of course, "never again" meant I'd soon cook something that just screams "I'M REDUNDANT". But then I thought....no one says "no" to adobo. No one. Today, I cooked darn good adobo for dinner, and I'm not just saying that to please my ego.

Nothing says "Hello world! I'm a Filipinooooooo!!!" than adobo. Be it pork or chicken, the meat stewed in soy sauce, vinegar, bay leaves with the optional sugar, left to dry a bit, served on a bed of steaming rice, is....amazing.

What I did was to stretch the recipe a little bit. I got the recipe from the lifestyle section of a local daily and my mom insisted that I try it. So  Instead of just letting it cook in the sauce, I fried the meat in oil afterwards, thickened the sauce to a gravy-like consistency and made fried rice using the adobo sauce. All in all, the adobo (sauce) on adobo (meat) on adobo (rice) was a feast for the senses. The garlicky smell really came through + the meat was tender and the perfect balance of salty sour sweet + the sauce and rice had the perfect texture.

Photobucket

A great way to end my night if I do say so myself, but I wouldn't really make this a daily habit...unless I wanted a one way ticket to the ER.

Fried Adobo with Adobo Rice 
Ingredients
1 1/2 kilo pork liempo (belly) cut 1 1/2 inches wide, 1/2 inch thick
1 small can liver spread
1/2 cup soy sauce
1/2 cup vinegar
1/2 cup water
1 tsp brown sugar
1 tsp cracked peppercorns
1 small head of garlic, crushed for adobo
1 small head of garlic, crushed for adobo rice
oil for frying 
Directions
1. Put all the ingredients in a saucepan (except garlic for the rice) and let it boil. Once boiled, lower the heat and cook until meat is tender. When cooked, remove meat from sauce, drain and set aside.  
2. Combine the liver spead with the adobo sauce and allow to reduce over low heat, until sauce thickens. Remove the sauce from the pan. The pan will also be used to cook the adobo rice.  
3. Fry the pork in oil until crispy but do not overcook. Remove from oil and pat with paper towels to remove excess oil.  
4. In the pan used to cook the sauce, fry the garlic in 1 tbsp of the oil used to fry the pork. Add 3 - 4 tbsp of the sauce and add 2 cups of cooked  rice and mix well.  
5. Serve the adobo on top of a bed of adobo rice and topped with the adobo sauce. 
Photobucket

Tuesday, March 29, 2011

Parmesan Chicken Breasts

Yesterday I woke up at around 10 am with no breakfast to be had. I know, poor boy. Anyway, I was so hungry + it was close to lunch time + a pack of chicken breast fillets were waiting in the fridge = you don't need to guess.

This is a fairly simple recipe that I just thought of. I haven't really tried and tasted it before so I was technically experimenting for lunch. I had some Japanese breadcrumbs I intended to use for Ebi Tempura but I was itching to try it together it parmesan cheese to make a simple coating for the seasoned chicken. The verdict? I liked how the meat turned out just right - juicy and tender. Next time I would double the parmesan cheese though, to make the the breading really pops with flavor.

Photobucket

This meal was a welcome respite from binge eating party after friggin party brought to me by my eager classmates. Not a day goes by without me eating lechon/roasted pig (It feels good to graduate! Or not). On second thought, I'm not sure if this recipe is really healthy though. Sure it's chicken breast, but coated with cheese and fried in oil? Not sure about that. Oh well, I can always sweat it out....eventually. I hope.

Parmesan Chicken Breasts
serves 1 - 2
Ingredients: 
2 medium sized chicken breasts
1/3 cup Japanese breadcrumbs
4-5 tablespoons grated parmesan cheese
1/2 tsp dried basil
1 egg
salt and pepper
 Directions:
1. Pound the chicken breasts to tenderize them. I used my fist (haha). Lightly season with salt and pepper. Let the chicken rest for a few minutes.
2. In a bowl, whisk the egg and season with a pinch of salt and pepper. In a separate bowl, make the breading mixture by mixing together the breadcrumbs, cheese and basil. Transfer to a dish shallow enough for easy and even coating for the chicken.
3. Heat enough oil to cover the pan. Dip the chicken in the egg first, then in the breading mixture. Fry it in the hot oil for 7 - 10 minutes on each side or until golden brown. Transfer to a plate and serve hot with grated parmesan on top. 

Photobucket

Looking back, I just realized how great this would taste with marinara sauce. OK, now I'm hungry

Saturday, March 26, 2011

Breakfast Carbonara

Photobucket

My mom and I had carbonara for breakfast today. The recipe has definitely been part of my 'to-do' list for a while now. Seriously, I'm hard-pressed to make a few dishes before my Licensure Review starts in two weeks. In a nutshell, the ingredients that I'm itching to play with are buttermilk, chicken breast, japanese breakcrumbs, peanut butter, nutella, shrimps, and mirin. NO, these aren't going into one pan.

Just stay tuned because part of my short-term bucket list is to CONQUER a few recipes and to cook up a STORM. It's just sad that I won't be able to blog and cook so much until JULY, since my review will last for two months, and I seriously need to focus if I want to get my license in one take. But for now, let's revel in the sweeetness...err savoriness.

Photobucket

I got the recipe from 80breakfasts, if you're interested. Trust me, you will. It's funny that I called this breakfast carbonara, because it actually had some small pieces of scrambled egg in it. The original recipe said to just stir the hot pasta in the scrambled egg to make a sauce. It was runny and I seriously wasn't convinced that it was safe for consumption, so I put the pasta with the sauce back in the pan for a few seconds.

By the way, I also wanted to do this because I wanted to begin the festivities early on, and welcome my morning on a happy note. Today, I'm graduating from college (!) And I could just well up in pride and happiness right now, but no, I just ate darn good carbonara.

Tuesday, March 15, 2011

Redemption cupcakes (Cheesecake stuffed Red Velvet Cupcakes with Almond Streusel)

I would like to think that this post is a long time coming.

When Julie Ruble, the brains and the spatula wielding hand behind Willow Bird Baking, declared all is fair in love and cheesecake and she was challenging all the would-be foodies out there to bake a Cheesecake (it's called the Cheesecake Challenge afterall) to inspire kitchen confidence and among other things, celebrate National White Chocolate Cheesecake Day (I'll skip this observation all together haha) - I didn't really have an iota of hesitation.

I really thought I could vindicate myself and rehabilitate my baker's ego after not one, but two less than stellar baking attempts. OK, the first one was less than stellar. The second incident was a complete trainwreck.

So in a nutshell: The first incident involved a Red Velvet cupcake recipe using rock salt, cooking oil and red food coloring powder. The outcome was a bit dry for my taste and when I bit into a piece of salty undissolved solid, I realized that we desperately needed iodized salt. It was also that time that I realized that to make my  life less stressful, I need the liquid variety of food coloring.

 The next one was for Valentines Day, when I wanted to surprise my mom with a Chocolate Almond Cheesecake. Bottomline number 1: Never ever ever ever use almond extract if the recipe calls for more than one drop and bottomline number 2: A springform pan must be held and handled along the sides, careful not to make the unstable bottom even more unstable. Long story short, 80% of the batter went into the bain marie. Trainwreck. I know.

So...redemption. That was in my mind the whole time I was perusing her list of cheesecake recipes to try. Funny thing is, I was supposed to make her Red Velvet Cheesecake  for Valentines day. Now I wonder what would've been the bigger disaster at that time. So that was definitely on top of the list since I wanted to try it once and for all. Then I saw her Chocolate Cheesecake Stuffed Cupcakes with Ganache and I was intrigued at how simple the directions were. Plus, it didn't involve a springform pan! I was juggling between the two recipes for quite some time when I realized....."hey, why not kill two birds with one stone?" I think I just had my lightbulb moment.

Photobucket

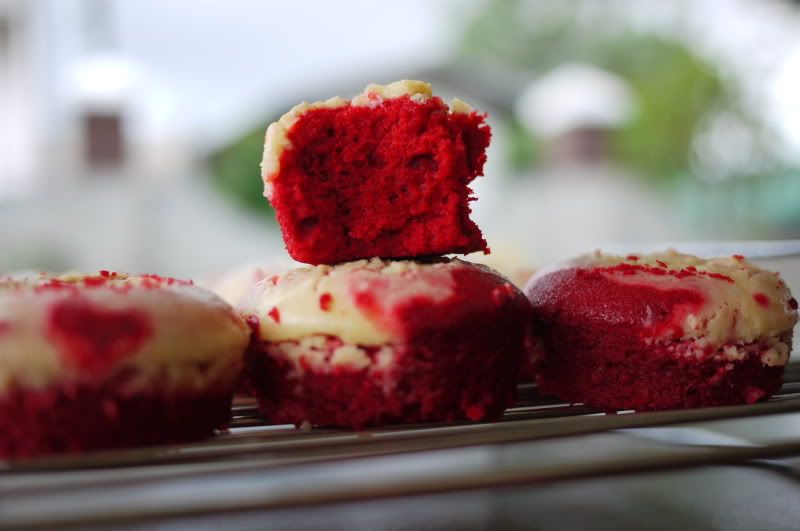
The cheesecake recipe I made is practically a mash-up. It draws inspiration from both recipes - it's the cupcake  WITH a red velvet base, same cheesecake topping BUT instead of adding chocolate ganache, I used streusel. Come to think of it, the cupcake could probably be the Red Velvet cheesecake recipe turned upside - down, inside - out and then some. Invert the original recipe and you get cake, cheesecake and crust (the streusel). My lightbulb moment keeps on coming!

Photobucket

 I finally bought shortening (instead of oil) for the cupcake and I didn't know it looked like solidified pork fat! Cringe worthy moment aside, there was a big difference in terms of consistency when I used shortening - the cupcakes were softer and more crumb-y in texture, which I actually liked. The inspiration for the streusel came from the idea of putting some leftover graham crackers to good use. Ironically I didn't use graham crackers and used slivered almonds instead. And it's safe to say I followed the recipe to the letter. The fact that the cupcakes didn't blow up in my face and the streusel didn't burn already says a lot!

Photobucket

Photobucket

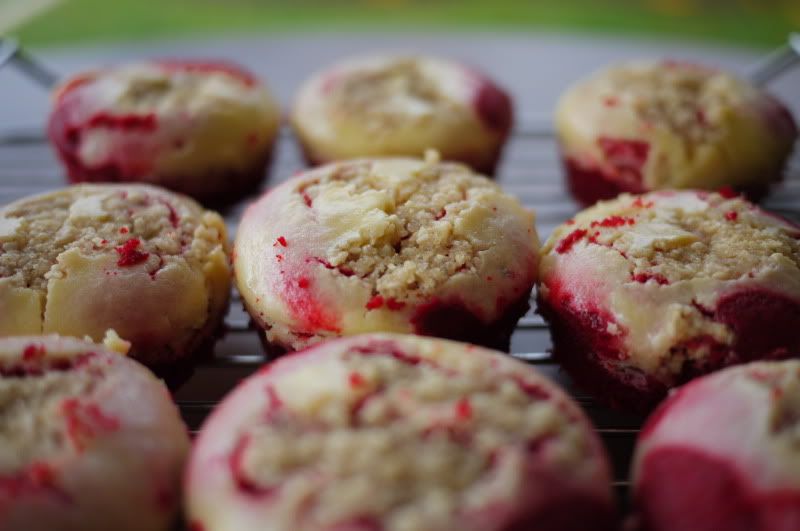
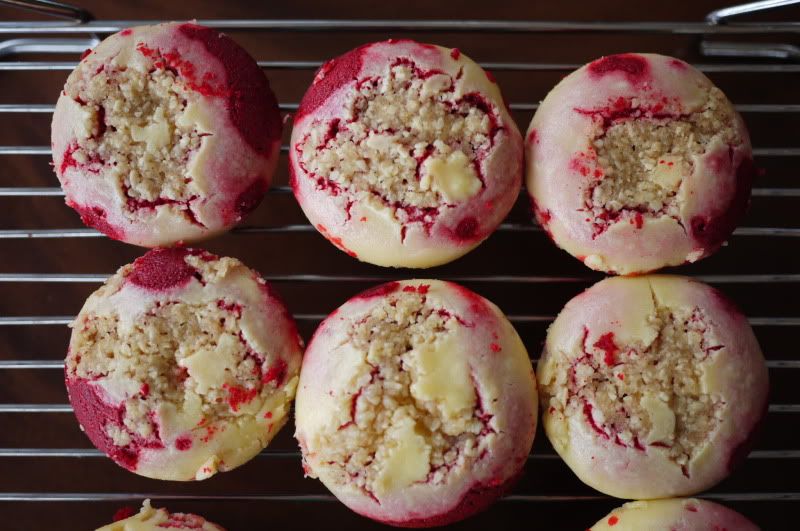
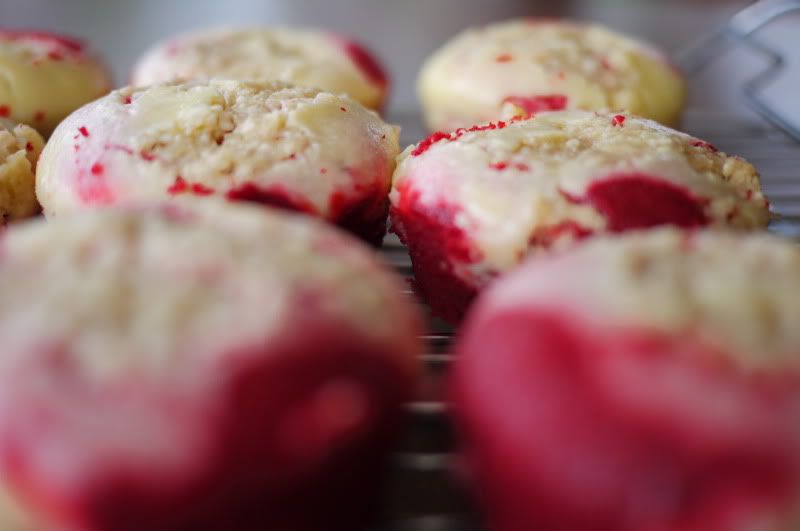
So the verdict?  The cake was soft, moist and the hint of chocolate was there. The slightly tart cream cheese topping really set well and complemented the cake. The streusel was just as I imagined it to be - sweet, slightly crunchy and not overpowering at all. It was, all in all, the perfect topping. I was glad I joined
The Cheesecake Challenge since I think I really kicked ass.

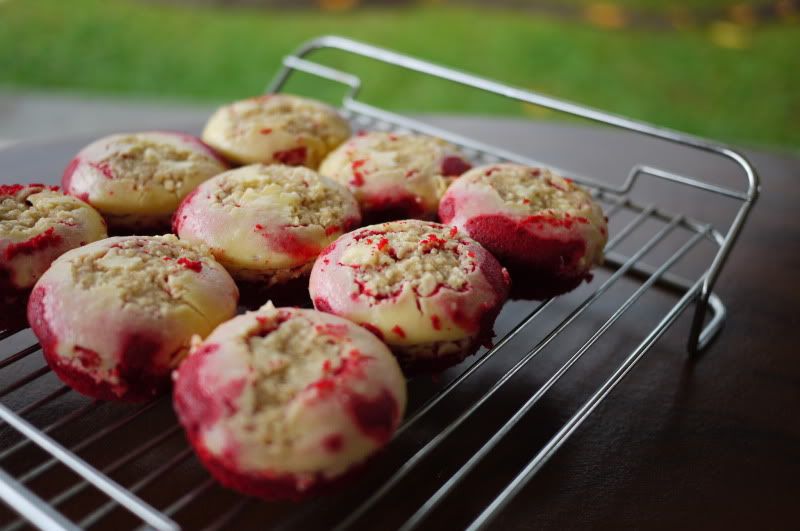
At the end of the day, I finally held redemption in my hands, and I gotta say, it tasted great!

Photobucket

Photobucket
Cheesecake Stuffed Red Velvet Cupcakes with Almond Streusel
inspired by the Red Velvet and the Chocolate Cheesecake Cupcakes by Willow Bird Baking 
Ingredients  
Cream Cheese Filling:
8 ounces (227 grams) cream cheese, room temperature
1/3 cup (65 grams) granulated white sugar
1 large egg
1/2 teaspoon pure vanilla extract
8 ounces (227 grams) cream cheese, room temperature
1/3 cup (65 grams) granulated white sugar
1 large egg
1/2 teaspoon pure vanilla extract

Red Velvet cupcakes
1/4 cup vegetable shortening
1 egg
1 tablespoon cocoa
1/4 teaspoon salt
3/4 cups sugar
1/2 teaspoon vanilla
1/2 cup buttermilk
1 1/4 cups flour
1/2 teaspoon baking soda
1/2 tablespoon white vinegar
1 ounce/2 tablespoons red food coloring

Streusel
1/4 cup brown sugar
2 tablespoons butter
1/2 teaspoon cinnamon
1/4 cup slivered almonds

Directions
For the Streusel: Grind/Process the almonds in a food processor until coarse to slightly fine. Add the remaining ingredients and process until well incorporated but not too smooth. Keep in the refrigerator until needed.

For the Cream Cheese Filling: In your electric mixer, or with a hand mixer, beat the cream cheese until smooth. Add the sugar, egg, and vanilla extract and beat until creamy and smooth. Set aside while you make the Red Velvet.

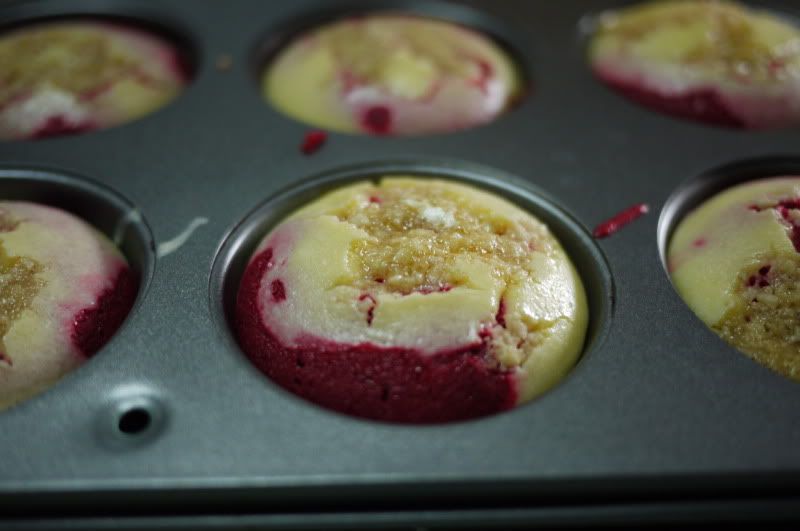
For the Red velvet cupcakes: Preheat oven to 350 degrees F. Cream shortening, sugar, and eggs. Make a paste of the cocoa and coloring and add to the shortening mixture. Add salt and vanilla. Add buttermilk alternately with the flour, beginning and ending with flour. Mix vinegar and soda right before using and add to mixture by folding in. Evenly divide the batter among the 12 muffin cups (resist the urge to overfill — remember that the cream cheese filling needs some space too). Spoon a few tablespoons of the cream cheese filling into the center of each cupcake. Crumble the hardened streusel and add your desired amount directly on top of the cream cheese.

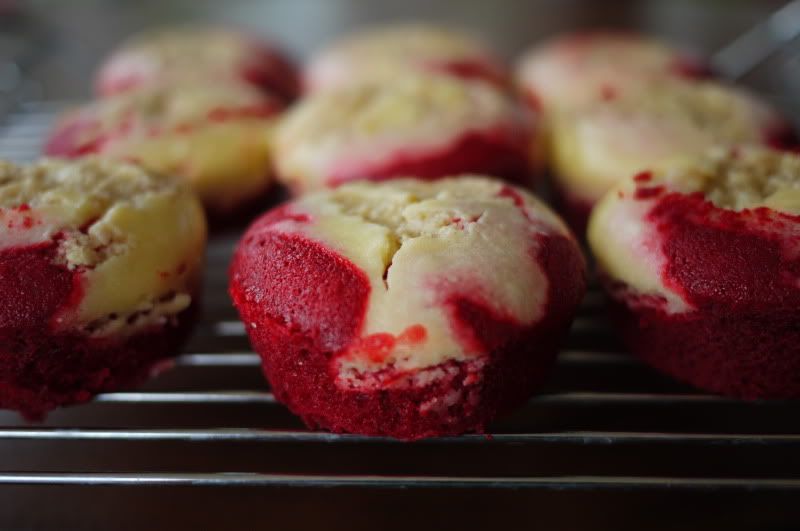
Bake in the preheated oven for about 20-25 minutes, or until the cream cheese filling is a little brown and the cupcakes feel springy to the touch (a toothpick inserted into the chocolate part of the cupcake will come out clean). Remove from oven and place on a wire rack to cool.
yield: 12 cupcakes 
Photobucket


Friday, March 11, 2011

"Winning" apron


I didn't really care for the video. I didn't even understand half of it. But I DO WANT THAT WINNING APRON! Anyone knows where I can get it?? 

Buffalo Wings, sauce and a dip

Photobucket
I've been itching to make Buffalo Chicken Wings ever since I tasted those amazing, delicious wings from Yellow Cab when I was in Manila. What was with the wings that had me at hello? First off, they were spicy, which I gather is a trademark of Buffalo wings. They were sour enough that it was crazy not to get more than....5 pieces. They were tender, not really that crispy but it works for me. All in all, they were succulent mouthwatering pieces of heaven.

I wanted my first Buffalo Wings attempt to be the "not from the packet" variety. There are seasoned mixes out in the market but I wanted to take the road less travelled and make my own sauce and cook it my way. Well, that simply means instead of frying the wings, I boiled, then baked them.

 In terms of the chili sauce, for the better part of my search, I always ended up being led to the one sauce that most of the food blogs I visit rave about - Sriracha style chili sauce. The recipe I got seemed easy enough, with all the ingredients readily at hand. I think what really makes the difference is the kind and amount of chili you put into the sauce. We really don't have a lot of chili pepper varieties here, except for the tiny ones, the long ones and the bell peppers. OK, I think the last one doesn't count.

Anyway, what was the outcome? Well, baking the wings definitely produced a different texture than what I expected. Boiling then baking definitely gave the chicken wings crunch. I didn't know baking could do that! But, I felt as if it was a bit dry and it didn't have the juicy quality I know Buffalo Wing have. Sure baking is healthier and stuff, but, I'm excited to do another batch with some modifications - deep fry the b*tches in hot oil WITH a stick o' butter. Yum. BUT my wings were still tasty though if I do say so myself. Maybe if I would stick to baking it, I would bake it for 15 minutes or less.

As to the sauce, more is I think, merrier. More chili peppers next time. But all in all, I liked the sauce because had a lot of components that work well together - the garlicky, tomato-y base was really tasty.

I would still give myself a pat on the back for this attempt. But believe me, I'm still craving for spicy sour chicken wings right now.


Baked Buffalo Wings
Adapted from food.com
  • 2 lbs chicken wings 
  • 2 tablespoons cayenne pepper
  • 2 teaspoons crushed red pepper flakes (I didn’t have this so I just slice some fresh chili)
  • 2 tablespoons salt
  • 1 cup Sriracha style hot sauce (recipe follows)
Prep Time:  15 mins                        Total Time: 45 mins 
Directions: 
  1. Fill a large pot half way with water and then add the first 4 ingredients.
  2. Bring water mixture and wings to a boil and then boil for 15 minutes.
  3. Transfer wings to an oven safe container coated with cooking spray. Bake wings on "Broil" (high) for 15 minutes on each side.(For crispier wings, cook longer on each side, maybe 20 minutes per side).
  4. While waiting for wings, combine the Hot Sauce and Margarine in a microwave safe container and cook in microwave for 2 minutes or until melted. (You can cook the sauce longer for a thicker sauce).
  5. When wings are done, mix with the sauce and enjoy!
Photobucket

It takes a few seconds for these plain jane wings to look like, well, buffalo wings

Photobucket
Chili Hot Sauce Recipe – Sriracha style
  • Chili peppers of your choice and amount (I used two finger chilis and four small bird’s eye chilis)
  • 4-5 med. cloves of Garlic, crushed or minced
  • 2 med Shallots, minced
  • 1 T Vegetable Oil
  • 2 – 8 oz. (or 1- 15 oz.) can of Tomato Sauce
  • 1 T Fish Sauce
  • 3 T Rice Vinegar
  • 3 T Sugar  
Directions: 
  1. Remove stems of chili peppers, rinse clean. Blot dry with paper towel. Wearing rubber gloves, mince the chili peppers. The smaller the cut, the smoother your final sauce will be.
  2. In sauce pan, heat oil then add minced garlic and shallots. Over medium-high heat saute for a about 1 minute or until light brown and fragrant. (don’t burn your garlic!)
  3. Add tomato sauce and minced chili peppers. Let sauce come to a simmer then lower heat to keep at a low simmer. Add fish sauce, vinegar, and sugar. Mix well.
  4. Continue simmering sauce for about 5 minutes. This will break down the chili peppers and soften them to create the smooth consistency. Remove from heat and allow to cool completely.
  5. Transfer sauce to blender and blend till smooth or until most of the chili pepper skin and seeds break down- preferably on the “liquefy” mode.
  6. Taste the hot sauce. Further customize the hot sauce to your liking: add more sugar, vinegar or water. Blend one last time till smooth. Pour into clean, air tight jar and refrigerate. Use within about 1 week.
Now, I remembered that the Buffalo Wings usually have a dip on the side, so I made my own version since we obviously don't have blue cheese here. 
Garlic Mayo-Mustard dip 
Ingredients  
 1/2 cup mayonnaise
1-2 tsp mustard
2 tsp garlic power
1 tsp cayenne pepper

Directions  
1. Wait for three days for the mayonnaise to spoil, then allow to age in oak barrels.
2. I kid. Combine all the ingredients in a bowl. It doesn't get any easier.

Photobucket

Tuesday, March 08, 2011

breakfast for one

I woke up this morning with my parents gone and off to work, and me without anything to eat for breakfast since it's already 10am. I know, poor me. So I was looking at our cupboard and I saw that my aunts (from Texas who went home two days ago) left us with a carton of buttermilk pancake mix, the "just add water variety". It doesn't sound fancy but at least I have something to eat. Plus, the ants were already first in line, so I had to do something before the demons eat what's left of my soon-to-be-breakfast.

So the "just add water" part didn't disappoint. Soon enough, 1 cup of mix with 3/4 cup water gave me two medium sized pancakes, which I realized in the long run, I couldn't finish without feeling gargantuan feelings of guilt and regret. 

I didn't have maple syrup but another thing my aunts left us was french vanilla coffee syrup. It probably sounds snooty but I was willing to try it out because it hopefully tastes great and would make my pancakes sing. Plus, who doesn't like the smell of vanilla in the first place? I mean, come on. 

Photobucket

So after a few generous drops of the vanilla syrup, a spoonfull of soft chewy goodness and few seconds later....

I decided to add a heaping spoonful of butter. Yes, butter. At least it was the unsalted kind. The pancake, well, wasn't really as tasty as, dare I say it, the local variety here. It wasn't really sweet and evenly cooked. I'm not sure if the latter was my fault though. And the syrup? The vanilla smell didn't push through the pancakes, and to top it all off, it was bland! Now I know why it was specifically labelled for coffee. 

Photobucket

The packaging was nice so I figured it tasted as good. Well, I figured wrong. I should've guessed that something as snooty as "french vanilla flavored coffee syrup"  would be, true to form, snooty (fake). 

Butter makes everything better. Good morning world! 

Photobucket

Friday, March 04, 2011

McCelebrate!

Today....is pretty bittersweet for me. It's the last day of my finals as a college student, and in a few weeks I'll be graduating. But not before I go through this one final loop called "NCM 109". Anyhoo, what's a good way to cap it all off? My mom will make barbeque since she's expecting a guest this evening! I won't be there, since my exam is at 5 - 7pm. I'm really excited to see if my marinade will work out in the end though. If it does, then I'll probably post the recipe here. Speaking of which, one more thing why I can't wait for my exam to be over is because I actually have TIME TO KILL before grad. Which means I can spend my last golden days in the kitchen before I officially sign up for the Nurse Licensure Exam review, so I think I need tunnel vision for the next three to four months or so.

I'd really like to celebrate with a McLobster sandwich, or probably a McRib. They look, well, good enough to eat. Too bad our McDonalds doesn't serve pork, and I don't think lobster is a practical option. But still, I can McDream....


Thursday, March 03, 2011

A few minutes with the ipad 2


This is a hands-on video of the ipad 2, and while I never really had the time to read about tablet reviews yet, HOW COOL IS THE COVER THINGY THAT DOUBLES AS A STAND? Lord, they had me at fool-proof. Now, notice how I'm really raving more about the Smart Cover than any other feature.


As with Apple’s case for the original iPad, the Smart Cover can be folded up to provide a gentle incline for typing, or flipped around to make a stand for watching video. In this latter regard, it’s vastly superior to the case for the original iPad, which always felt a little bit wobbly in this configuration.Lest we judge the iPad 2 by its (Smart) Cover, let’s remember that it’s what’s inside that counts. In this case, it’s an Apple-designed dual-core A5 processor. It’s very hard to test speed of a device like this, especially in a controlled environment like a demo room. The iPad 2 certainly felt fast—really fast. GarageBand and iMovie, both apps that presumably tax hardware to its limits, moved smoothly. While we don’t know for sure how much memory the iPad 2 contains, 512MB—the same as the iPhone 4—seems like a reasonable guess. Read the full article here 
 This definitely makes my decision harder. SERIOUSLY.